Utility Room Storage Ideas
It's been a few weeks since we
renovated the laundry room
and I am thoroughly enjoying use of the space. If you recall, for this project
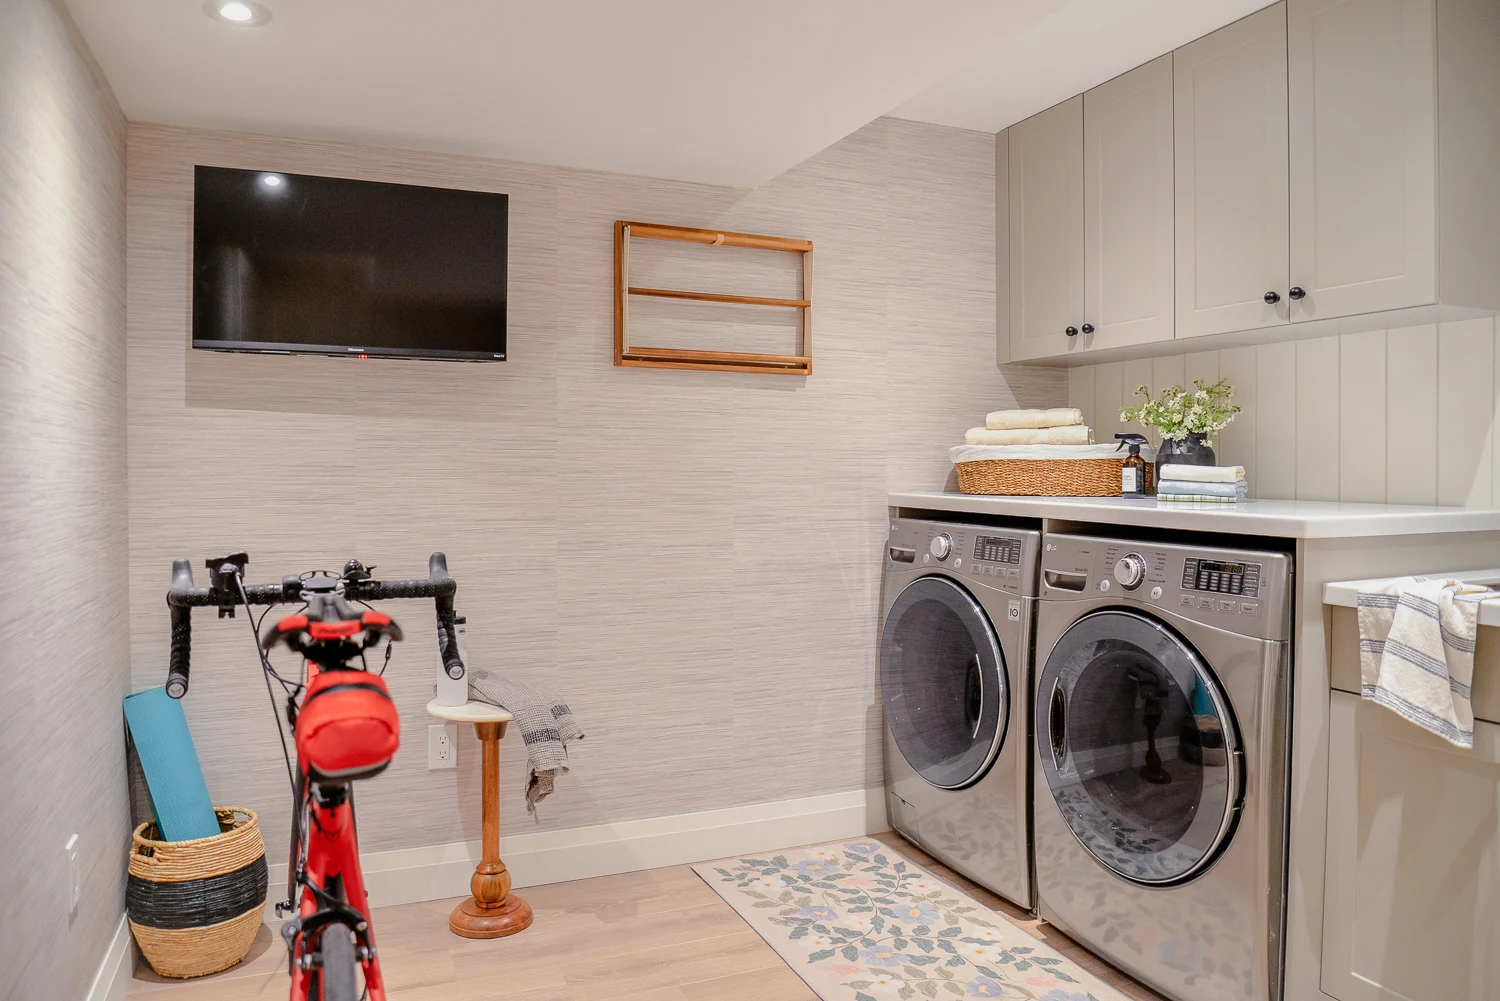
we took our large utility space and split it into two: a finished
laundry/workout room, and an unfinished utility room. Today, I'm showing you
what the utility room looks like!
Separate Laundry and Utility Rooms
But first, you might be wondering why we created two separate rooms. With a
dedicated laundry space, we were able to move all the laundry essentials into
a single space, making them easy to access and organize. You'll find the
washing machine, laundry baskets, ironing board, laundry detergent and other
cleaning products in the laundry room. Having our own laundry room has made a
huge difference in how efficient and enjoyable we find laundry day!
Essentially we built four new walls and enclosed the laundry room. This
allowed us more wall space to affix laundry room cabinets, create storage for
our laundry hampers, and hang things on the wall like our peg shelf and drying
rack.
Which brings me to a renovation "pro tip" I've learned time and time
again:
Get the shape or structure of your room right first and then focus on the
decor and design of the room.
Larger spaces don't necessarily mean better functioning spaces. Sometimes,
removing walls gives you opportunities for better flow and improved
sightlines. In other instances, adding walls (or extending walls as we did in
our basement family room) can lead to better layout and function of an
interior space.
Unfinished Utility Room
Having a small room for laundry and a small room for utility needs was the
best way to maximize use of both spaces. It was also the best use for our
budget. We chose to allocate funds to cabinetry and a sophisticated laundry
room look as that would be a space in which we would spend lots of time.
Conversely, creating a 'bare bones' utility room, using materials we already
had on hand, was appropriate for a seldom used space.
Here's a look at how the utility area looked before we separated the spaces:
You can see that this area was a jumble of essential but unattractive
fixtures. Many of these things were fixed and had to stay:
- the furnace
- the overhead HVAC duct work
- the water heater
- the electrical panel
There were also a few items like our vacuum cleaner, our mini freezer, and the
vertical file cabinet that also had to find a home in the utility room. The
laundry appliances and utility sink would move into the laundry room freeing
up some space.
Here's how the utility room looks like now:
Utility Room Decor Ideas
There wasn't too much we could do with this little space but we made the most
of it! I wanted to give the room a fresh feeling and add in practical storage
solutions where I could. Here's what we did to clean up the space.
- emptied out the room and found new homes for non-essential elements
- vacuumed floors, walls, and exposed ceiling joists and cleared out all the cobwebs
- painted the floor using leftover paint
- painted the walls and electrical panel cabinet with leftover paint
- reused the existing fluorescent light bar and centred it in the room
Paint Storage Ideas
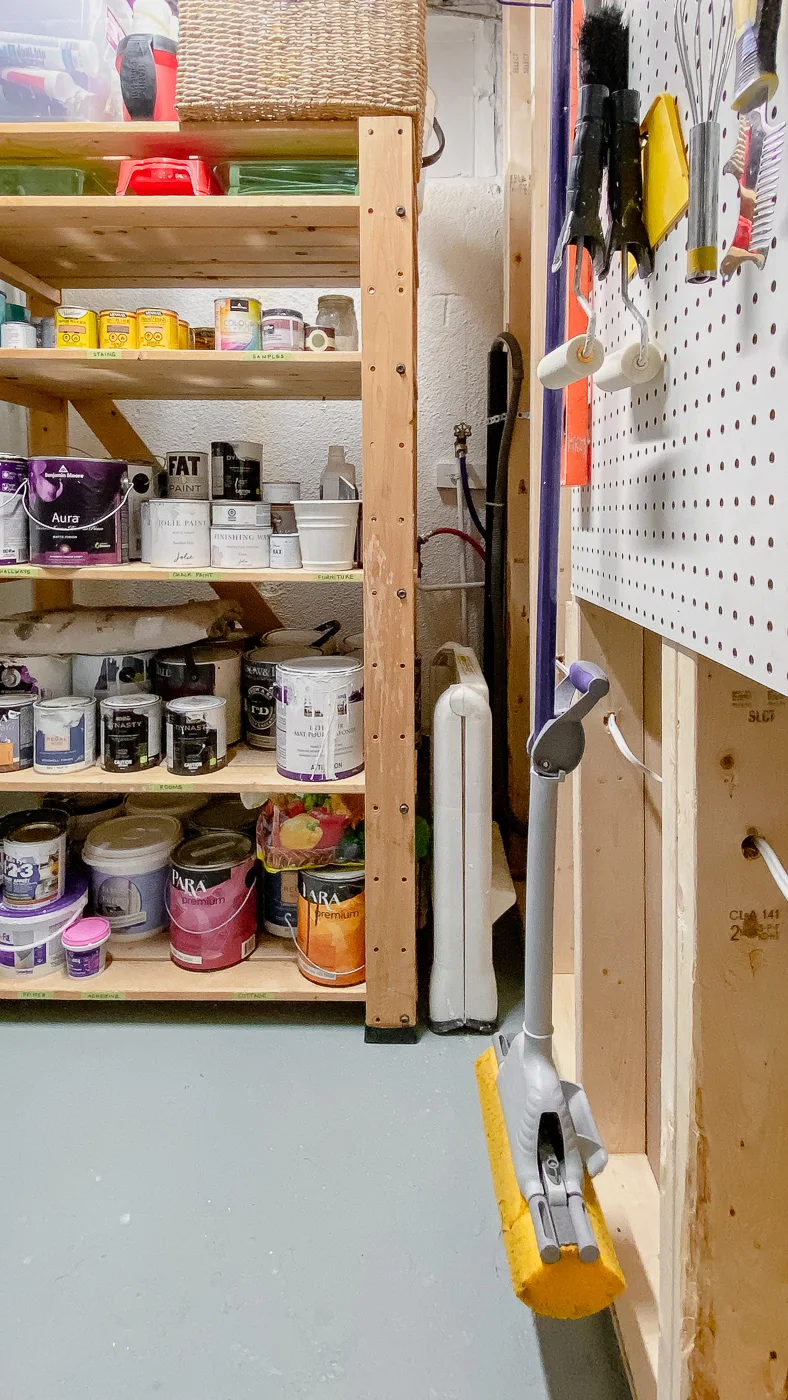
Once those changes were made, we could start to lay out the room. First step
was moving the wooden shelving rack into this room for additional storage
space. It's an IKEA Hejne unit. We've used these shelves for years and have
used them in storage spaces in our current and previous homes. They're strong,
well built, and can bear the weight to dozens of paint cans.
Is it obvious I'm a paint hoarder? I dislike the thought of getting rid of
perfectly good paint so you'll find leftover paint from our first home, our
current home, our cottage, and many furniture paint projects on these shelves.
I took the opportunity to separate and organize the paint by room/house and by
type. Stains, chalk paint, and samples have their own assigned (and labelled!)
shelves. I've also put primers and adhesives together for easy access. There's
also enough room to store our paint trays and rollers on narrow shelves.
Additional bins on the upper shelf hold caulks and glues, and other household
cleaners.
Washing Machine Valves
There's just enough room on either side of the shelving unit to store our
vacuum and our step stool. They're tucked away yet still accessible - I love
that. One other thing to note is that the water shut off valves for the
washing machines are also accessible in the utility room. You can see them on
the back wall behind the step stool.
Had we left the valves in the new laundry room, we'd have to build them into a
box either behind the machines or above the countertop (which would impact the
shiplap backsplash). Moving the valves into an adjacent room keeps the laundry
room looking neat. It's
a trick we also used in our last laundry room:

|
| Water lines accessed from storage room beside the laundry room |
While not ideal, we have our mini fridge, file cabinet, and folding chairs
stored in this room as well. There's just enough floor space to move around
and get what you need.
Just like in the laundry room, the new wall provided an opportunity for clever
storage. We chose not to add drywall to this unfinished space and instead took
advantage of the exposed studs to add in storage. We've moved the fire
extinguisher closer to the entrance and simply screwed it into a stud.
Pegboard Storage Ideas
The most exciting storage though is the
new pegboard! There's a few reasons we added it here:
- pegboard is inexpensive and can be cut to any size
- pegboard can be installed on any vertical space and keeps things off the floor
- you can customize your hooks to hold and arrange your items in a way that functions for you
- pegboard provides visual storage and easy accessibility. You can see your items at all times
- pegboard keeps you organized. Everyone knows exactly where to get and put back any items
I knew it would be a good idea to make use of this wall space, but I didn't
anticipate how much I would actually love this peg board! There's lots of
ways to use pegboard. I've divided the peg board into zones with areas for:
- Painting supplies: paint brushes are kept on a single hook (great for drying!), rollers and roller handles are stored on double hooks, and painter's tape and duct tape are stored together. We also keep smaller items like scrapers, spatulas, and utility knives in this area
- Cleaning supplies: the mop and dust pan and brush are stored on high hooks and kept off the floor
- Household tools: keep screwdrivers, scissors, a flashlight, or the tape measure handy for small interior fixes
There's a bit of extra space to add more hooks if I need them. For now, this
custom storage solution is functioning perfectly - and I don't have to ask
"where's the crosshead screwdriver?" anymore!
With a bit of cleaning, sprucing, and planning, this utility room became a
productive and useful room in our home. Even better, we only had to buy one
sheet of pegboard and everything else was something we already had.
I hope you enjoyed this look at how we got two awesome rooms from this one
renovation. Here's a last look at the Before and After!


