Installing The Laundry Room Cabinetry
And work on the laundry room continues. But unlike previous weeks where all I
had to show you was drywall, this week is very exciting as we have some
cabinetry installed!
It came as no surprise, but this part of the renovation is progressing
rather quickly. The assembled cabinets we're using, the
Hampton Bay line in Edson Grey
from The Home Depot Canada, are made for projects just like this.
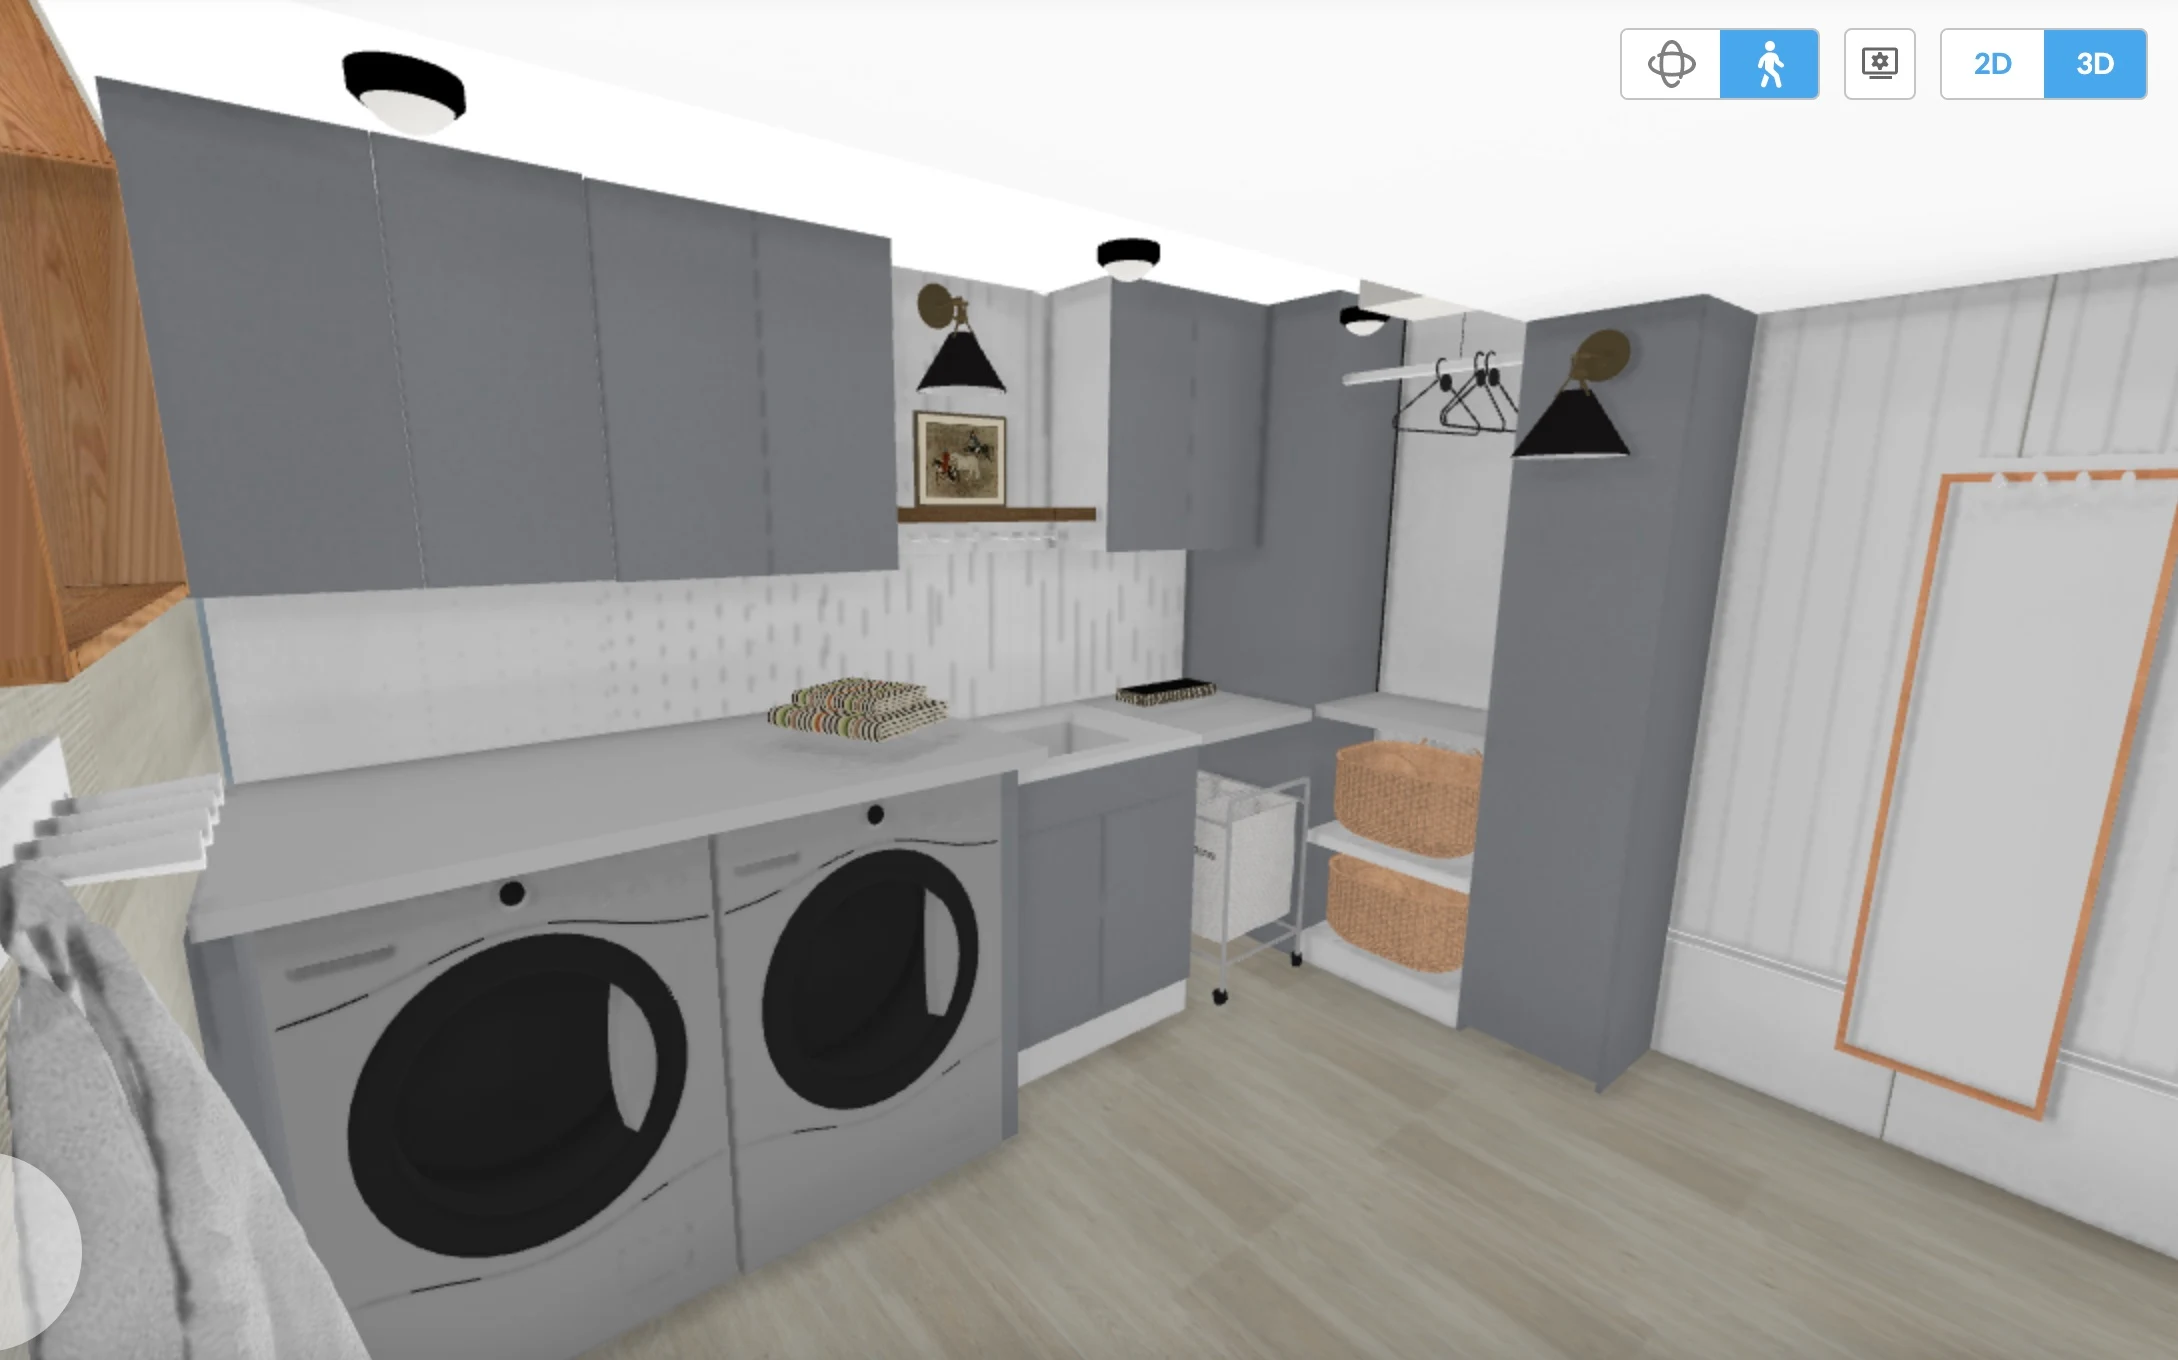
Let's revisit the 3D rendering of the cabinetry layout:
Laundry Room Cabinetry
I've devoted one side of the laundry room to cabinetry and maximized the
layout in a small footprint. Here's what I needed to store in this area:
- washer and dryer machines
- a sink cabinet
- open space for the rolling laundry cart
- shelving to store our two laundry baskets
- a hanging rod
- upper cabinets
In addition to those functional needs, the cabinetry layout had to take
into account:
- three different ceiling heights
- a pillar in the corner
- a laundry chute in the ceiling
Figuring this out was no easy feat. First, I took the measurements of the
stock cabinetry and figured out the maximum sizes of cabinets I could use in
the space. I ended up with:
2 - 27x30" upper cabinets
1 - 21x30" upper cabinet
1 - 30" wide sink cabinet
2 - 15x30" upper cabinets stacked to form a tall cabinet
To create the remaining cabinetry (gables to hold up the countertops, the
open space for the rolling cart, and the basket shelves), we will use a mix
of
factory finished panels
cut down to size, and DIY panels and gables made to fit. The DIY panels will
be made using
5/8" melamine panels,
melamine veneer edging, and paint matched to the cabinets.
We've never used melamine veneer before so I hope it takes paint well!
Ideally, the panels will blend right in with the cabinetry.
We've got the assembled cabinets installed and they are looking fantastic.
Did you notice the filler panels at the ends of the upper cabinets? We
create DIY filler panels
for all our cabinets to give them a high end, built-in look.
This area, however, will require a bit more effort. We've still got to:
- build in cleats to hold up the countertop
- add a second shelf
- add a hanging rod
- install a gable on the other side of the cabinets
- create a filler for the top of the cabinets
- decide if we want to back this with shiplap or a mirror
It's a tight fit, but I think it's looking great so far!
And here's one little surprise we added: a TV! We won't have cable in this
room so I chose a smart TV that we can stream our devices to. It'll be
perfect for watching TV while running on the treadmill or while we're folding piles of laundry.
I went with the
Hisense 32" Smart Full Array LED Roku TV. We have this
same TV in a larger size in our basement
and just love it. This isn't our first TV in a laundry room. We had one in
our old house too and it was a feature that we wanted to repeat here.
 |
| Laundry room in our previous house |
The room is taking shape and can't wait to have the cabinetry finished in the next few days. Come back next week to see how it all looks!


