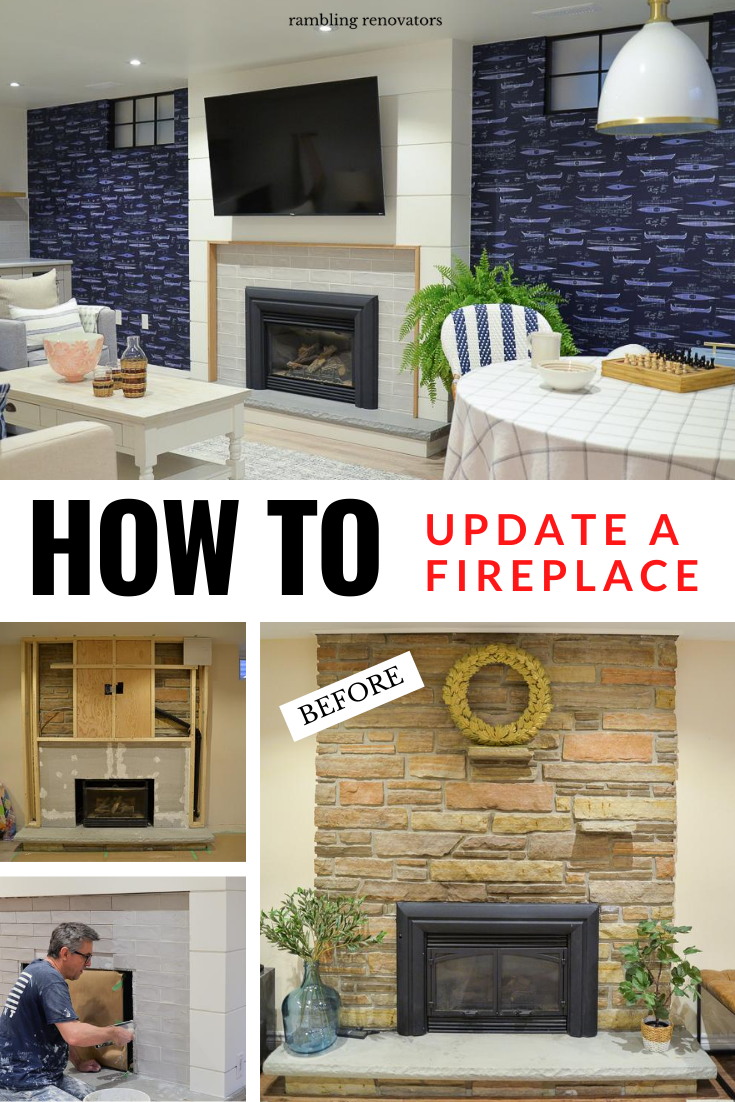
How To Update A Stone Fireplace
Looking for stylish ways on how to update an old fireplace? These inspiring stone fireplace makeover ideas will help you transform a
dated hearth into a stunning focal point—without a full renovation.
It's been a few weeks since we finished remodelling
our basement for the One Room Challenge. I'm happy with all of the changes we made, but none moreso than our
decision to update the fireplace.
Our stone fireplace makeover happened over a few weeks and was documented on
my
weekly ORC posts, but I thought I'd create a single post with fireplace makeover ideas, share
the step-by-step on how to update a 1970's stone fireplace, and tips on
how to frame a fireplace.
One thing I learned during this process: people have strong opinions about
fireplaces and updating them can be very controversial! So while the way we've
updated the surround and resurfaced our fireplace might not be your personal
choice, I've included lots of other ideas in this post that might provide the
solution you're looking for.
Ideas To Update A Fireplace
Having a fireplace in your home is certainly a treat. Nothing beats sitting in
front of the living room fireplace on a chilly winter night with a cup of tea
in your hand and warm throw on your lap. But what to do if you've got an ugly
stone 1960's or 1970's fireplace on your hands? What if you think your
fireplace is an eyesore, dated, and doesn't fit in with the rest of your home?
Can you modernize a fireplace? How do you update a 1970's fireplace?
Let's be clear
If your fireplace functions well, a fireplace makeover is an expensive way to
get a whole new look. There are lots of ways to update a stone fireplace or
update a brick fireplace.
Things To Consider Before You Update Your Fireplace
Before you undertake drastic changes, you'll want to take a few initial steps:
- Assess the condition of your existing fireplace. Before you begin any renovation or updating, it is important to determine whether your fireplace is in good condition and safe to use. If you have any concerns about the structural integrity or the safety of your fireplace, consult a professional before proceeding with any updates.
- Consider your style preferences. Updating your fireplace can be a great opportunity to give it a new look and make it more in line with your personal style and your current living space. Decide on the overall aesthetic you want to achieve, whether it's a modern and sleek look or a rustic and cozy feel.
Style Ideas for Updating A Fireplace
Do you love the existing stone on your fireplace and just want to give it a
more current style? An ugly fireplace makeover doesn't need to involve a top
to bottom overhal. Perhaps giving it an
over-grouted look is something you can do in a day following
DIY instructions. Or maybe a simple
painting of the brass accents
is enough to make your fireplace feel fresh.
Changing your fireplace decor
is an easy update to consider as well.
Updating an old fireplace can be an expensive undertaking. Looking at
Before and After fireplace photos and defining your budget beforehand can help you narrow down options.
If you're craving significant change, you can achieve that with a bit of
imagination and DIY effort. Here are six ways to update an old fireplace:
1. Paint the stone or brick fireplace
This is a quick and easy budget-friendly option that can be done in an
afternoon which makes it a good choice for older fireplaces that are in good
condition. If the old brick or stone is chipped or breaking off, you can hide
some of that damage by painting the fireplace stone.
Painting the stone or painting the mortar in between the stones is a look that
is currently very popular. Before you embark on this project, ensure that you
are using appropriate paint for fireplace stone. Latex paint or chalk based
paint are best as they have great adhesion and coverage.
If you like the feel of stone but want to update it in some way, painting your
stone fireplace is an option to consider.
- For a farmhouse look, you can opt for the trendy "German Schmear" technique which will allow the colour of your original brick to show through but softened and not appear so stark and uniform.
- You can also go for more opaque coverage when painting a stone fireplace. Use diluted paint in multiple coats and different colours to add depth and interest.
- Lastly, to give a traditional fireplace a new bold, modern look, go for a fresh coat of paint with full coverage and an unexpected paint colour. Apply multiple coats of dark paint on the brick, hearth, and fireplace mantel to create a high-contrast focal point.
Here's an example of how Krista at
The Happy Housie painted her fireplace brick
with a full-coverage paint job in classic white paint. She not only painted
the red brick fireplace with latex paint, she also painted the old firebox (no
longer used) with black high-heat resistant spray paint and added a new wood
mantel. It was an instant update and the end result is completely transformed
look!
Another popular look is a limewash as done here by my friend Courtney at A Thoughtful Place. It's a bit of a lengthy process that involves cleaning, spraying, painting, and grouting but really creates a soft and updated look. Head to her blog for the full step-by-step tutorial.
Peel and Stick Paint Samples:
Picking just the right paint can be tricky so before you embark on a painted fireplace project - or any paint project - I highly suggest that you
invest in
peel and stick paint samples. These are really a revolutionary and useful product and the easiest way to
pick paint!
I like that
these samples can adhere to most surfaces and will stick (temporarily) to drywall,
tile, or brick. They are reusable and repositionable and you can keep them to
use for future projects.
Samplize
(US company, carries Benjamin Moore, Farrow and Ball, Sherwin Williams, and
PPG brands) and
Hello Paint
(Canadian company, carries Benjamin Moore and Sherwin Williams) are two sites
that sell large format peel and stick paint samples.
Peel and stick paint samples are definitely cheaper than buying multiple small
cans of sample paint! See
HERE for a quick video on how I used them in my office project.
2. Install a new mantel
Another way to update your fireplace is to leave the brick intact but change
the mantel. If your brick or tile is in good condition, you might be able to
create a whole new look just by removing and replacing the mantel.
You can achieve different looks with a mantel. Opt for a salvaged vintage wood
mantle to add unique character. For a rustic look, consider topping your
fireplace with a weathered beam
shelf mantel.
SHOP FOR SHELF MANTELS:
Stuck with a mantel that doesn't suit your style? Take inspiration from
this project
where they've removed a wood mantel and replaced it with a DIY shaker style
mantel. Checking In With Chelsea offers free plans on her website on
how to build this DIY mantel.
3. Convert to a gas fireplace
Do you prefer less maintenance and an updated look? Converting your existing
wood burning fireplace to a gas fireplace can give your fireplace a more
modern feel, while heating up your room quicker and easier.
Gas fireplaces are more efficient, require less cleanup, and easier to use
than their wood burning counterparts. There are
several methods to consider and
different gas inserts
to achieve the look you want.
4. Upgrade the insert
If your fireplace is not efficient or no longer working well, you can consider
upgrading the insert. This will help to improve the performance of your
fireplace, and can also make it safer and more energy-efficient. Additionally,
newer inserts will have more modern and updated look.
5. Update the surround
One of the easiest and most impactful ways to update an old fireplace is to
replace the surround. This can be done with new tile, stone, or other
materials to give your fireplace a fresh new look.
Tiling or retiling a fireplace
requires a few days effort, but it can dramatically change the look of your
fireplace. The
installation method
used will depend on whether you are removing the old tile or placing the new
tile directly on top.
SHOP FIREPLACE TILE:
If you like the look of real stone or fireplace brick, consider masonry veneers. These lightweight, artificial stone products can update your fireplace
while maintaining the warmth and texture of stone. You can achieve a smooth
stone or faux brick look to your liking.
You can also retile the surround using ceramic, stone, porcelain, or glass
tiles. Depending on the tile design, you can incorporate any style from
traditional to modern, ornate to minimal.
Laying fireplace tile
is a project even a novice DIYer can do so don't be afraid to give it a try.
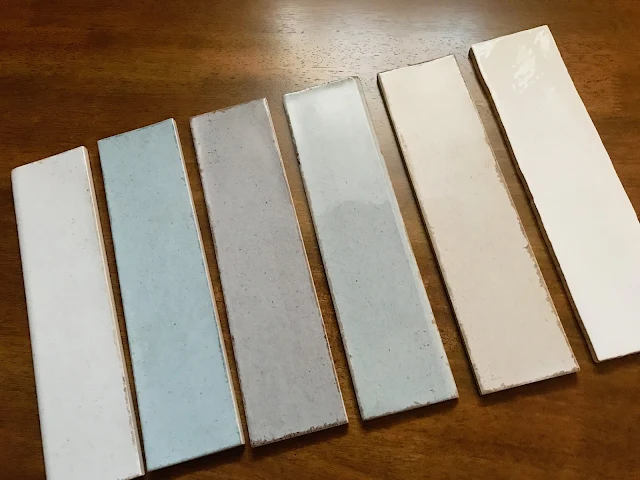
Shown above a few of the tile options we considered for our old fireplace. You
can see more
in this post.
The tiles are from
The Tile Shop. They offer a great selection of tiles from glazed to honed finishes, small
to elongated tile sizes. Ultimately we went with the
Retro Perla Ceramic Subway Tile in 3"x12" which has more of a handcrafted look.
6. Update the hearth
The hearth is the area around the fireplace that sits on the floor. Like the
surround, it can be updated with new tile, stone, or other materials as well.
The is is a budget-friendly way to get a new look as you won't require a lot
of material for the job.
You can use the same materials for the surround and the hearth but it is not
absolutely necessary. Another option is to use materials in the same colour
family or same material type, but use them in different sizes. For instance,
use a grey marble mosaic on the surround and a marble slab on the hearth.
7. Reface or resurface the fireplace
Cladding the fireplace in a new material, such as pine boards, MDF, or a
granite slab, can bring new life and change the shape of bulky stone
fireplaces. This is a more labour intensive change but if you want to entirely
eliminate any visual remnants of an old, dated fireplace, you might consider
completely refacing it.
8. Update the accessories
Once the fireplace has been updated, a final change you can make is adding
accessories. Adding a fireplace toolset or screen will help it to look
polished and complete. You can enhance the look further by hanging artwork or
a mirror above and adding items onto the mantel such as candlesticks, decor
items, or plants.
Our 1970's Stone Fireplace Update
In our situation, there was no way to retain the materials and shape of our
1970's stone fireplace when what we craved was a clean-lined, modern coastal
look. We were not fans of this ugly fireplace with its multi-coloured,
almost "fake" looking stone and how the fireplace appeared recessed into the
wall with a large hearth. I love stone fireplaces in the right context but
this updated, modern basement was not the right fit.
Our desire was to have a fireplace that was more of a focal point in the
room and was contemporary and fresh in it's style. We decided to proceed with making several changes and updated the
surround and hearth, resurfaced our fireplace using shiplap, and adding
new accessories.
How To Frame Around An Old Fireplace
Our floor to ceiling fireplace makeover involved updating every surface, from
the stone, to the hearth, surround, and gas insert. I recognize this complete
transformation might not be to everyone's taste, but we were able to get an
entirely new look without having to rip out the old fireplace.
We don't shy away from DIY projects and I'd consider this one as an
intermediate level project. Here's the step by step instructions we followed
for our DIY fireplace makeover and how to frame around a fireplace:
Step 1: Consult With The Professionals
Before any fireplace remodel, you'll want to ensure your fireplace is in good
working order. We considered getting a new gas insert but it was surprisingly
difficult to find one that fit this small firebox. The insert was in good
working condition and could be updated with a new coat of high heat paint, so
we decided to work with it.
Our fireplace hadn't been serviced in quite some time so the first step was to
call in a fireplace technician to clean and service the unit. The technician
also confirmed that we could safely move the unit forward 2", so that it would
sit in front of the new tile surround.
As you'll see, we also had a licensed electrician bring in power to within the
fireplace framing, for the insert plug and for a new TV which would hang above
the fireplace. Bring in the professionals before proceeding with any
structural changes.
Step 2: Construct The Fireplace Framing
Our new fireplace design involved building a new frame in front of the old
stone fireplace. We felt new fireplace framing would be much easier than
attempting to remove the old stone, or trying to mortar the old stone and
create a new level surface. The three stone shelves were easily knocked off
with a hammer and new wood framing around the fireplace was built using
2"x3" studs from The Home Depot.
The fireplace framing sat flush against the face of the stone, and extended
two inches beyond the left and right sides of the stone. Proportionally, this
would look good against the planned tile surround and gas insert frame. We
decided we keep the fireplace simple and would not have a mantel.
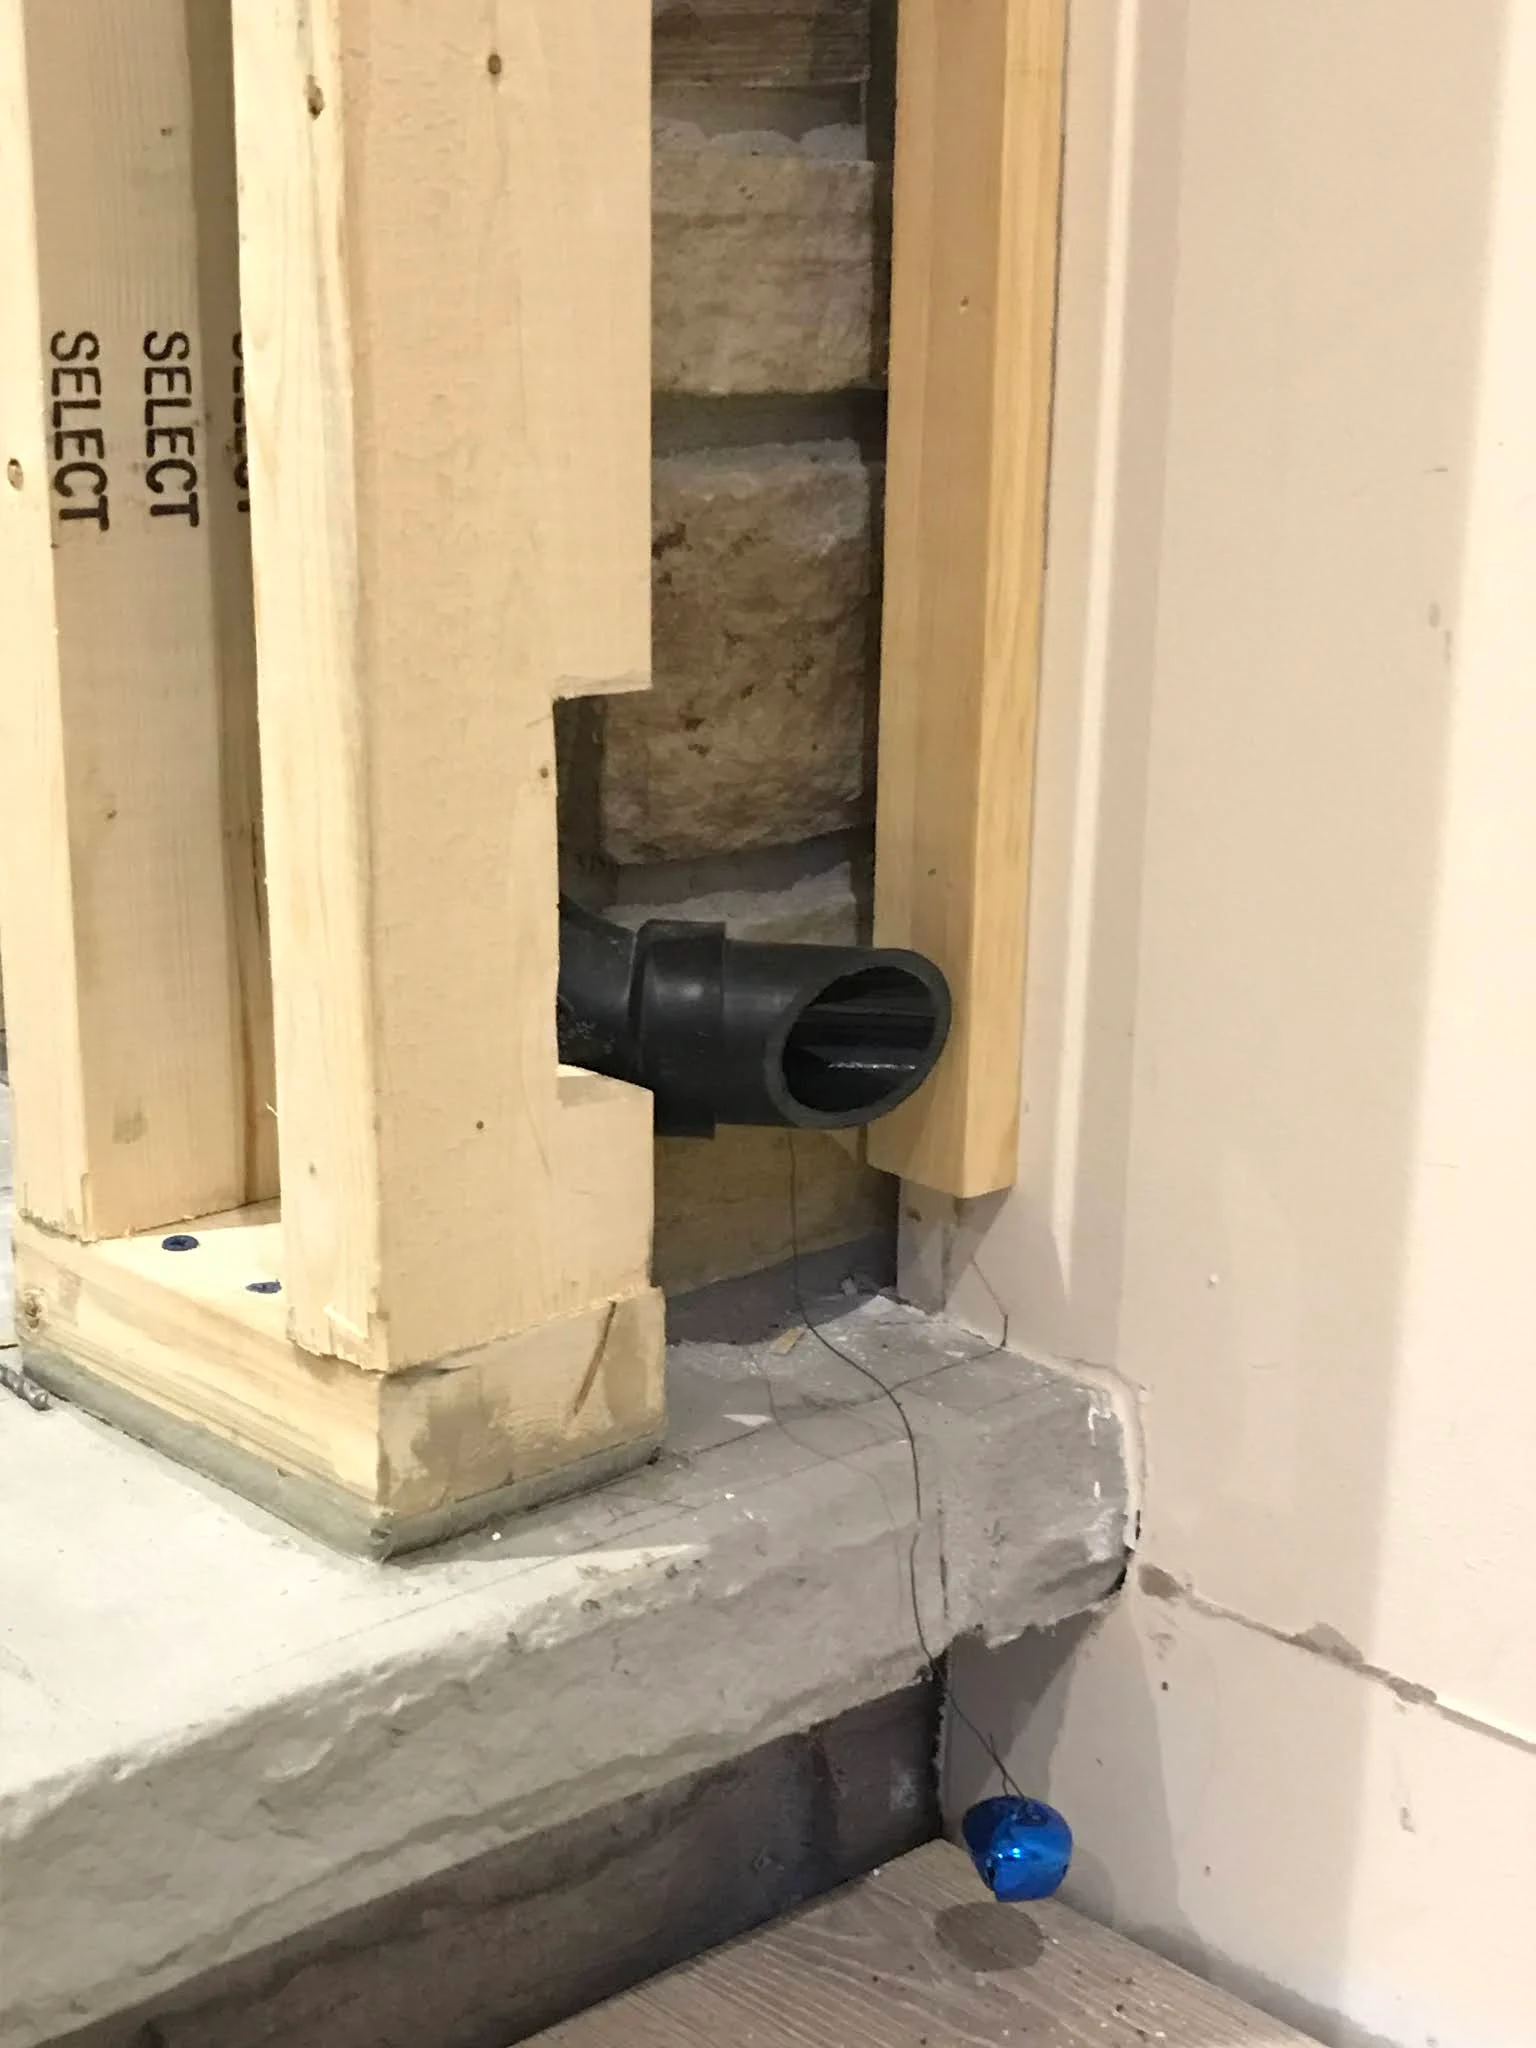
Step 3: Create A Chase for Cables
As we planned to have a TV above the fireplace, we used this opportunity to
build in a way to hide the TV cable wires. You definitely want to anticipate
any needs like this upfront so that you end up with a clean look at the end.
Using plumbing pipes, we created a chase from the middle of the center stud
down to the bottom right corner of the fireplace. The plan was to have the
cables come out at that location and then feed them down to a media cabinet on
the right side of the fireplace. The media cabinet would hold our cable box.
To feed the cables through the chase, we came up with this solution. We fed a
long piece of floral wire with a jingle bell on the end through the chase. We
kept some extra wire at the top entry point, and wrapped it around the stud to
hold it in place.
Once the TV was installed, we would wrap that top end of the floral wire
around the TV cables and pull them through the chase, without worrying they
would get stuck inside. The openings of the chase would be covered with
electrical brush plates to allow the cables to move freely.
Step 4: Install The Substrates
This fireplace design required two substrates, or layers of material sitting
beneath other materials. The first was the plywood substrate to support the
TV. Having this backing in the general vicinity of the TV would make
installation of the TV easier than trying to secure the TV to individual
studs.
The second substrate was the
cement backerboard
for the tile. The building code requires that you have non-combustible
material within the first 6" from the fireplace face. We cut the cement board
to fit the surround area and to within 3" of the insert. The gap between the
cement board and insert would be covered by the gas insert cover.
Step 5: Install The Cladding
With everything in place - electrical, wire chase, substrates - we could then
close up the structure and add the cladding on top of the framing.
We started with a first full piece lined up along the top of the surround and
working our way upwards to the ceiling and downwards to the hearth from there.
The left and right edges were mitred to ensure a clean wraparound on the
sides.
Step 6: Paint The Shiplap
After install, we filled any gaps with
Dap DryDex and painted the shiplap in Benjamin Moore Simply White, to match the
rest of the basement.
Step 7: Install And Grout The Tile
Tile installation came next. We used
Retro Perla, a glazed ceramic tile with an irregular edge. The organic, natural feel of
the tiles contrasted nicely against the clean lines of the shiplap.
We paired the warm grey tile with sanded grout in
Snow White by Polyblend. It provided a subtle contrast that wasn't too stark and
bright.
Step 8: Paint The Hearth
Next step was to paint the hearth. I wanted to use paint I already had on hand
and swatched many different colours. I ended up selecting a colour that was
close to the original concrete hearth. The small tester sample was more than
enough to paint the hearth. I applied it with a foam roller brush to ensure
good coverage and even application.
Step 9: Finishing Touches
This fireplace makeover wouldn't be complete without a few final
touches.
- We added baseboard beneath the hearth, to hide the original stone base. The baseboard was cut down to size and painted in Simply White as well.
- We spraypainted the gas insert frame with high heat paint in matte black
- We added a stained wood wrap. Because of the new framing, the tile surround sat recessed and we needed to cover the transition between the tile and shiplap. A simple wood wrap added warmth and tied in the other wood elements around the room.
Step 10: Hang The TV
The last and final step was to mount
the TV. Surprisingly, we were able to secure the small cable box behind the TV
using velcro straps; we didn't need to use the cable chase after all! We've
kept the floral wire and jingle bell in place though, just in case we need
that functionality in future.
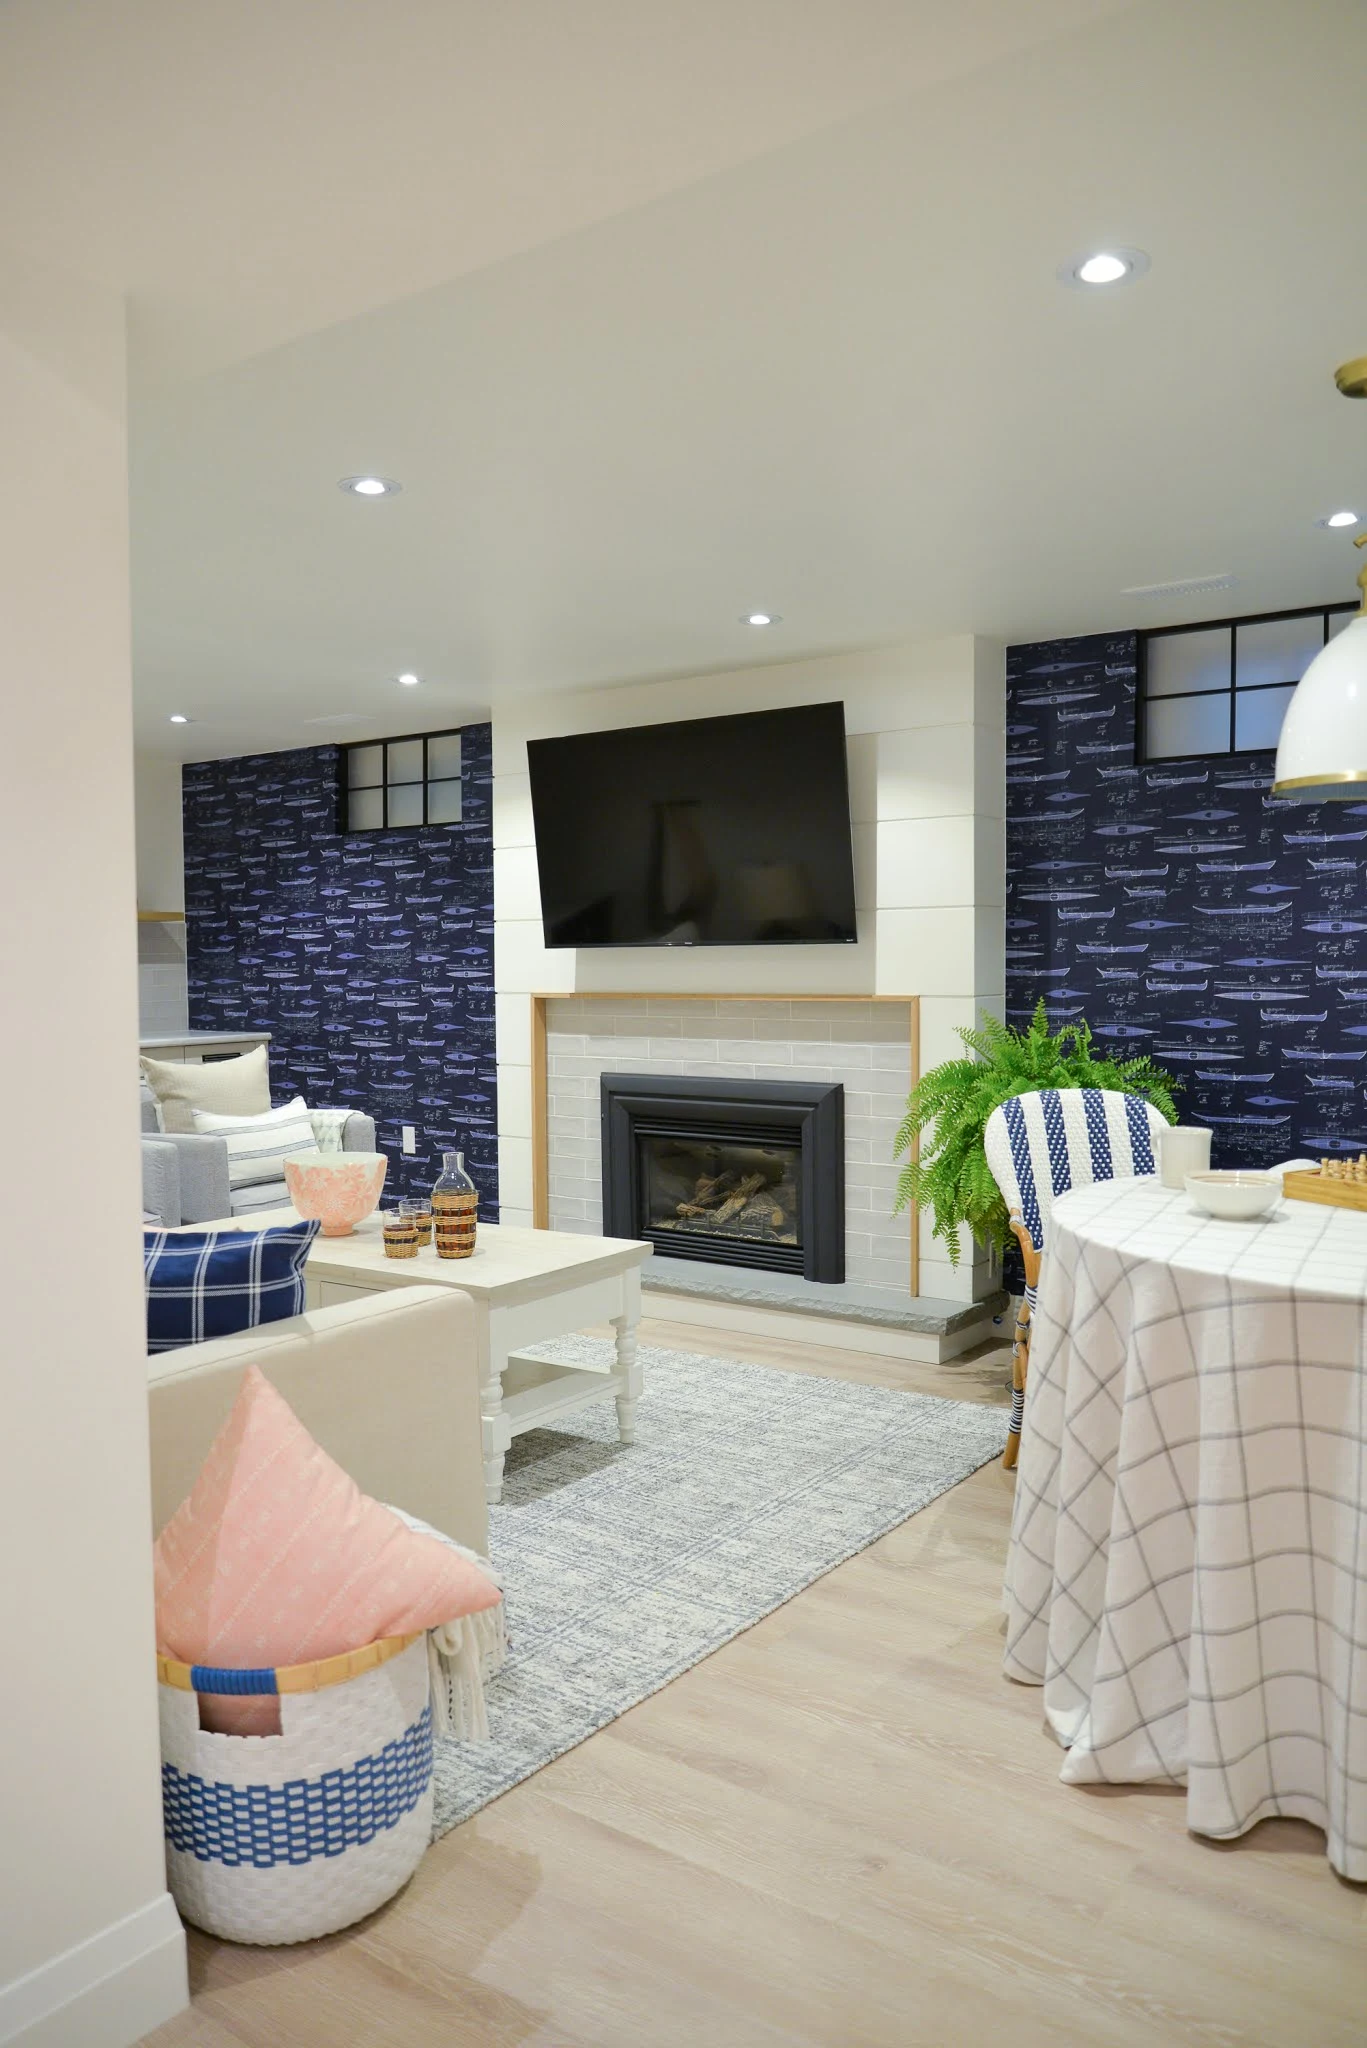
It took some time and a lot of steps, but we're thrilled with our updated
fireplace! This beautiful fireplace has made a huge difference in our
enjoyment of the basement.
One more fireplace Before and After and you'll see how we took this from
dark and dated, to bright and fresh.
See more of this basement transformation
here.


0 comments